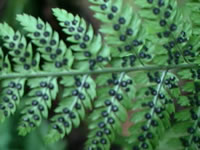
How to Propagate and Grow Ferns from SporesThey reproduce with spores that form on the underside of the fronds. Propagating ferns with spores is a fun and fairly easy method of growing new plants, but it can take up to a year before you see any sign of life and 2-3 years before your new ferns are ready to be planted in the garden. |
|||
What are Spores? | |||
Preparing the Growing Medium for Growing SporesAll planting material, tools, trays and pots should be sterilized prior to use, in order to ensure success! Sterilize Your Tools, Trays and SoilIf you are using pots or flats that have been used previously, you will need to clean them thoroughly, then sterilize them by dipping them in a solution of 1-2 tablespoons of household bleach to each gallon of water. Allow them to dry thoroughly. The growing mix will need to be sterile as well, to kill off any competing spores that may be present in the medium.Probably the easiest way of sterilizing the soil is to fill the pots or trays with growing mix, cover them with a towel to prevent washout, then carefully pour boiling water over the entire surface until the mix is thoroughly saturated. Allow the mix to cool completely. You can bake your mix in the oven... if you can deal with a little unpleasant smell. Preheat oven to 200 degrees. Place the growing mix into a turkey sized baking bag and tuck the open end under. Lay it flat on a large cookie sheet. Poke several holes in the top of the bag and press a meat thermometer in the center. Bake until the soil temperature reaches 180°, then allow it to cool in the oven. Re-wet the mixture completely, using distilled water. If you plan to do much spore propagation in the future (or seeds for that matter), pick up a $20 microwave oven at Goodwill.Fill a bowl with growing mix, pop it in the oven, and nuke it until its steaming! Allow mix to cool in the microwave. Re-wet the mixture completely, using distilled water. After filling the pots or trays with moistened medium, tamp them well to remove any air pockets and firm the soil! | |||
| |||
|
Seal the planters with plastic wrap or container and keep it in a warm, bright (not full sun) place where they can remain, undisturbed for the next several months to a year (depending on the species). Fluorescent lights will work fine at this point. Monitor the moisture of the growing mix to be sure it remains evenly moist. If the mix begins to dry out, mist it or bottom water with room temperature, distilled water. A properly sealed container will seldom, if ever need watering. From Spore to Prothallia to PlantletsFrom this stage on, warm (72°-75°) constant humidity is essential for success. Bottom water only! Small plantlets will begin to develop from the sections of prothallia that will form small fronds. Once plantlets have developed several true fronds you can pot up the healthiest ones into cell-packs or small pots, and cull any that aren't thriving. After they have grown several more fronds, move them up to 3 or 4 inch pots for growing on. Return them to your propagating case. Hardening Off Your New FernsIn about another year, your ferns will be ready to move into larger pots for tender species or into the garden for hardy ferns.Your ferns have lived a very pampered, luxurious life style up until this point and will need to eased into the reality of the world beyond their propagation case gradually. Begin by opening the case in stages to get them accustomed to less humidity before removing them completely. Ferns that are going to be planted in the garden should be allowed to the temperature changes by only putting them outside for a few hours during the warm part of the first day, increasing the exposure time each day. NEVER move any plant straight into full sun! Have fun, Good luck!
|
|||

