How to Plant Container Grown Plants and Flowers
|

|
Annuals and perennials that you purchase at the garden store or nursery come to you from the protected environment of a greenhouse.
They will need to be gradually introduced to direct sun before they are planted in the garden
to prevent them from getting sunburned.
Set your plants outdoors in a sheltered, lightly shaded spot,
then move them around to gradually increase the amount of sun they receive each day.
It is a good idea to do your planting on a cloudy day or late in the afternoon
to avoid the heat of the midday sun and prevent undue shock to the plant. |
|
Plan your garden layout in advance
To lay out the garden more effectively,
the plants were set around the planting area, while still in their pots.
After a bit of pondering, each was placed in the approximate location where it would be planted.
The mature height of the plant, as well as other growth habits, culture,
and color were considerations in these decisions.
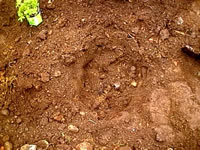
A hole is then dug in the prepared garden area, three times the width of the pot, and twice as deep. |
 |
|
 |
Add compost and other organic matter
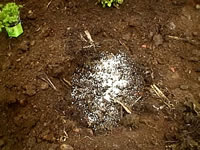
A generous amount of compost, peat moss and ½ cup of all-purpose (10-10-10) fertilizer
was added to the original soil from the hole.
The soil was then blended thoroughly and returned to the planting hole,
leaving enough room in the center for the root ball. |
|
Removing plants from their pots
Water the plants thoroughly!
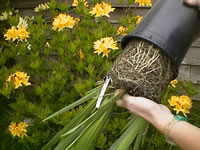
Remove your plant from it's pot by placing the hand over the root ball to support it, and inverting it.
Give the pot a couple sharp raps with the trowel handle to loosen the roots. The container can now be lifted from the plant.
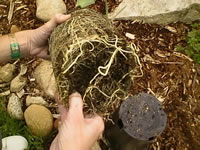
Because the roots had grown out and compacted against the pot, it was necessary to 'feather the roots' out.
Using your fingers to gently pull the surface roots away from the root ball will induce the roots to once again grow outward.
If the roots are severely compacted, you may find it easier to make a few shallow cuts through the roots on the side
and bottom of the root ball, using a sharp, clean knife.
Prune off any severely damaged roots prior to planting.
Avoid damaging and stressing your plants!
Never remove them from the pot by pulling them out by their leaves or stems.
Before you actually put your plant into the ground, turn it around and examine all sides to be sure that
the
best side is "faced" in the direction it will be viewed from most often.
|
|
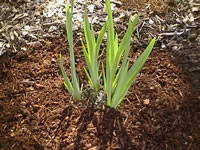
Apply a mulch after you plant your new garden
The plant is placed into the hole at the same depth at which they grew in the pot, and the remaining soil is added. Water the plant thoroughly to insure that the soil fills in completely around each root.
Mulch your new transplants with compost or some other organic matter to keep the roots cool and the soil moist.
Set
a garden stake in the hole if this is a taller plant which will need support
to reduce wind and rain damage.
The stem should be tied to their support using strong, stretchy materials that won't cut into growing branches. Strips of old nylon hosiery will work very well for this. Loop each tie into a figure 8, with the crossed portion between the stem and the support to keep stems from rubbing or being choked. |
 |
|
|
|
|
Search The Garden Helper: