How to Create and Care for Dish GardensDish Gardening Made Easy |
|||
|
The majority of this time may well be spent on choosing just the right container, accents, and plants, because the actual construction of a dish garden is really quite simple and quick. Simple enough, that even a child can easily put one together for Mom or Dad! |
|||
Choosing a Dish Garden Planter |
|||
Dish Garden Planters and Accents* Among other things, I once discovered a ten inch wheelbarrow with a set of miniature tools. Although it was made to be an ornament on it's own, this was a perfect planter for the gardener in the house.* Any basket, old or new, can be used by simply placing a non-draining container inside of it. * For the fisherman... an old fishing creel can be easily lined with plastic and planted, or used to simply cover your actual planting container. * Dollar stores always seem to have a few mini-planters depicting a deer, a duck, a cow or a truck. Although they are usually only suited for a single small plant (which usually outgrows it quickly,) they are sure to bring an instant smile... * Small logs can be hollowed out... A great home for a small fern forest. * Adobe bowls look great as "cactus scapes", when filled with small succulent plants. * A rusted milk can, old boot, even an old pet dish can be given a new use in life. * The ultimate dish garden, of course is a terrarium, which is easily made from old aquariums or jars. Choosing Appropriate Dish Gardening PlantsUnfortunately, because dish gardens typically have limited root space, the plants will tend to outgrow their home rather quickly. For this reason, it is a good idea to choose slow growing plants to prevent having to replace them too often. Choose plants which have the same general lighting and water requirements as your other choices.
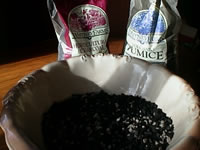
Setting Up and Planting Your Dish GardenAdequate drainage is probably the most important provision to ensure the success of your dish garden.The best method of draining the excess water from the soil, is through drainage holes in the bottom of the planter. The hole(s) should be covered with a piece of broken pottery or a screen patch, to prevent the soil from washing out. This type of planter will require placing a water tight tray under the garden, to protect the table or other surfaces from water damage. Use a good commercial potting soil, to which you have added coarse sand or perlite to aid in the drainage. Add a sufficient layer of this soil mix, so that when you set the new plants in place, their soil level will be about 1/2 inch below the rim of the planter. |
|||
Landscaping your Dish GardenIf the planter is sufficiently large, you may create different levels of terrain within your garden. Firm this soil layer lightly. |
|||
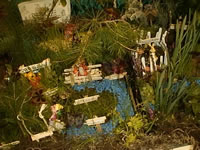
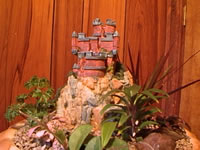
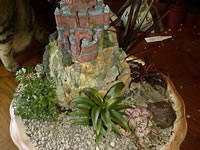
Adding Plants to Your Dish GardenMake sure that the plants are thoroughly watered before proceeding!Once you have your master plan worked out, you are ready to plant and landscape your dish garden. The plants can be easily removed from their pots, with their entire root structure unscathed, and ready for planting. Support the plant by placing your fingers over the soil, forming a 'V' around, but not touching the stem of the plant. Turn the entire plant over, and give the pot a light rap with a screwdriver handle. This should dislodge the root ball, allowing the pot to be easily lifted off. (You may have to take a second whack at it.) Normally, at this point of transplanting any potted plant, you would want to lightly loosen the outer roots of the ball. Because a slow growth rate is desired in most dish gardens, it is better to just leave the roots alone in this case. Remove the pots from two or three of your plants at a time, beginning with the tallest plants first. Set these plants into position, making any final adjustments as to where they will "face". Fill in around each plant with fresh planting mix, and then continue with this process until all of the plants are in place. Add more soil as needed to fill in areas. Pack the soil gently, and water it lightly. You can top the soil with a mulch of fine bark or small gravel. Accents like small twigs and stones can be used to hide any bare plant stems, or to highlight an area of the garden. Any other ornaments you choose to add to your landscape, will add to the artistry, the character, and the personal touch... Watering and Caring for Your Dish GardenAllow the soil in your dish garden to become nearly dry, before you add a small amount of water again (start with a cup or so...). Never allow the soil to become too dry, or too soggy. Experience will quickly teach you how much, and how often to water. Generally you will not have to fertilize your dish garden. The plants will seldom be in place long enough to deplete the nutrients from their soil, before they are moved on to a bigger planter. Of course, if the plants have been in the same soil for too long you can feed them, but use a VERY dilute 1/4 strength liquid house plant food. With a little care, your dish garden will become an ornament for your home, and a living memory.
Search The Garden Helper:
| |||


